Bread has been the staff of life for centuries. Lately, it has received some bad press, but whole grain bread, in its simplest form, is one of the healthiest things to eat and gives you the energy you need to tackle the challenges of the day. Good bread, in its purest construction, uses just a handful of ingredients. Despite its ease of making, bread has been handed off to the “expertise” of bakers and large corporations instead of the hearth at home. That’s a shame because baking bread at home takes very little time and is also a timeless skill. We can’t think of a single instance where we wished we knew less about how to feed our families or ourselves. It is survival at its basics, but it is so much more.
When you learn how to bake bread, you are joining the chain of millions who have come before you in a rhythm and art that connect you to the grains that grow in the earth and the nurture of creativity. Taking raw ingredients and making them into something to nourish and delight is magical and powerful. The kneading and forming of the dough is almost meditative, and there’s just something calming about taking time away from the day’s chaos and focusing on the dough. Many are finding this for themselves, and we’re very excited to see the revival of homemade bread.
There are a few tips and tricks for baking at home that will make your bread-making more enjoyable. Here are a few areas that we have found to be most helpful.

Keep it simple. That’s not just good advice for life; it also applies to bread ingredients. Clean ingredients are the key to healthy bread. The best ‘back to basics’ recipe will have just a handful of ingredients and be all-natural. Good bread only needs flour, water, salt, and yeast. Adding oil or fat is optional but increases shelf life. This simplicity should reassure you that you have the skills and resources to bake a delicious loaf of bread.
Whole grain high-protein bread flour is the best choice for your bread. It provides a higher nutritional value than regular flour, containing more fiber, vitamins, and minerals. Many brands of bread flour are out there, and some have added chemicals. Look for fresh, milled whole grain flour. The freshest milled whole grain bread flour will not need added sugars or sweeteners to cover the flavor of rancid oils. Some whole grain flours have been on the shelf for up to a year before being sold, and they will taste that way.
It is always a good idea to check the freshness of the yeast as well. If you use regular active dry yeast, 1/2 tsp is the correct measure, but it will take more (up to 1 tsp) if it is older. If there is still a problem, add 1/4 cup of sugar or honey to the recipe to help get the yeast active (especially during the winter).
In the professional bakery, the traditional bread dough is kneaded for several minutes by machine, then watched and carefully put through an exact regimented cycle of raising and forming before baking. It is a several-hour process that requires watching to be sure the dough doesn’t over-mix or under-mix. The amount of yeast had to be exact to prevent it from rising too fast or too slow. This process takes at least three hours from start to finish. It is a lot of work. Making bread at home using this traditional method means setting aside a three-hour block a few times a week to supply bread for the family.
Most of our Chef’s homemade bread is now made by simple mixing and then long, slow fermenting. This method is called ‘No Knead’. For example, she makes the dough late in the evening before bed and leaves the container with the dough in her fridge. It takes three minutes to combine all the ingredients, and then it is ready to go into fermenting mode. In this recipe, we use a small amount of yeast for the most flexibility when the dough needs to be formed into a loaf and baked. The beauty of the no-knead is that it takes a long, slow fermentation time, which will develop a beautiful gluten structure in your bread (instead of long kneading). This slow ferment replaces mixing. Knowing that you can adapt the process to your schedule and preferences is empowering.
Watch the temperature of the water when making the dough. Don’t let my water get over 110°F when combined with the yeast. This will help you avoid killing the yeast from high temperatures. The right water temperature is crucial as it activates the yeast and helps the dough rise. Another temperature to be aware of is the temperature at which you raise the bread. Raising the bread during winter will take up to an hour longer for the second raise in the pan because our houses are cooler. If you’re like us, we keep it around 70 during the winter, and a good ten degrees colder inside will make a difference in how fast it rises exponentially. The solution would be to turn on the oven to “warm.” Place the dough in the loaf (ready to bake) in the oven, covering it with a mist of water. Turn off the oven. It should be raised in an oven around 100°F or less, so don’t leave it on! Once it has risen, pull the loaf out of the oven. Preheat the oven to 400°F and then proceed to bake.
The molding technique, or the technique for forming the loaf of bread, is the best way to trap air inside the loaf and give it a nice, rounded shape. The more air trapped in the loaf, the lighter the finished loaf will be.
Pull together the dough in a bunch, forming a smooth surface on the ball (rounded) side of the dough.
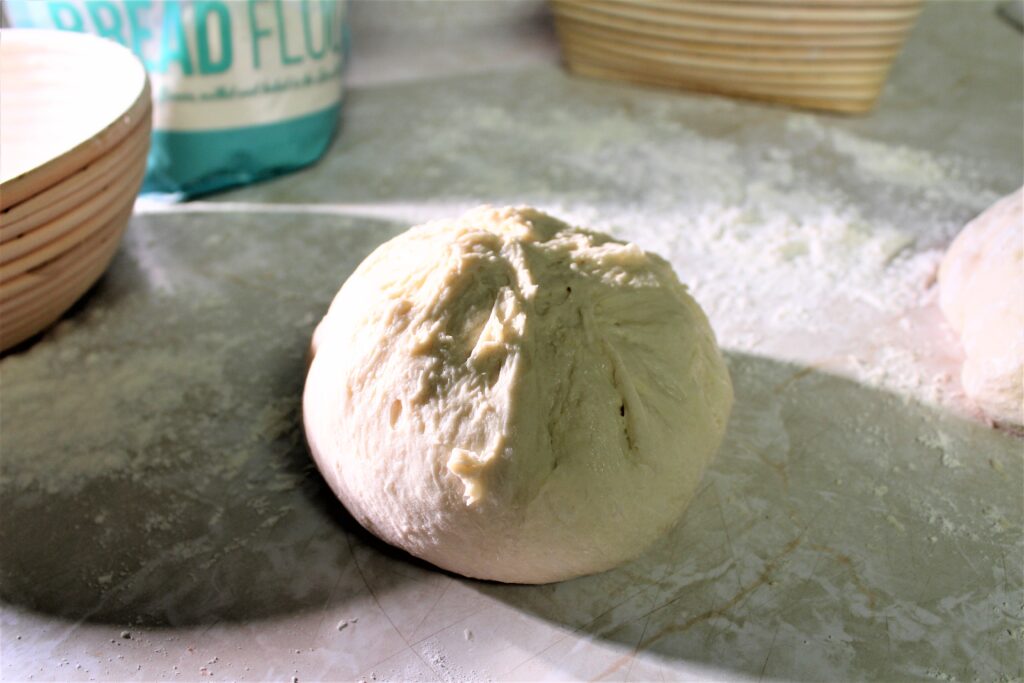
Flip over, so the knot is at the bottom and the smooth side faces up in the cast-iron pan.

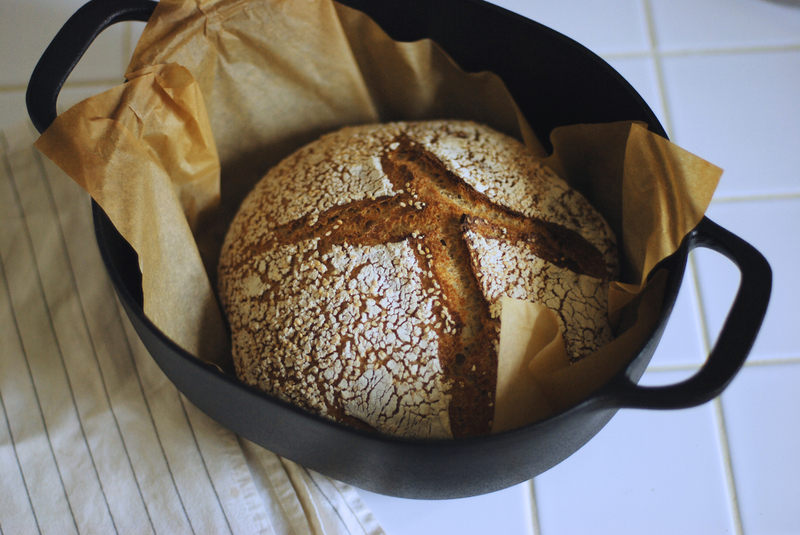
We bake it in a cast iron Dutch oven to mimic a stone oven, leaving it covered for 15 minutes at a very hot temperature. The enclosed cast iron holds in the steam, allowing the loaf to develop a crisp-chewy artisan crust. Then, we removed the lid, lowered the temperature, and finished baking so the loaf could cook through without the crust getting too dark.
6 cups (720g) Specialty Grains Whole Wheat Bread Flour
2 ½ cups (560g) Water, lukewarm
1 tsp. (6g) salt
1 tsp. (3g) Active Dry Yeast